How to get started - SignMee
- Charles Bergeron (Unlicensed)
- dorcas.chak@maestrano.com (Unlicensed)
- Alex Barret (Unlicensed)

Signmee letterhead and form creation, form distribution and tracking
Once you set up a Signmee business account, we recommend you add your business letterhead to the library. This letterhead can be used on all your forms. A business can create any number of business letterheads, so feel free to create letterheads to meet your business needs. The following explanation outlines where to create/store/update your letterhead. Once created, you can start building and sending forms.
1 – Navigation – switching from using Signmee as a business, to using Signmee as an individual
When you create a Signmee business account from Maestrano, you will notice the business name in the red navigation bar at the top of the screen. What you may not notices is that you also have a personal Inbox, which can be accessed from the business name dropdown. This inbox is where you can receive forms to fill/pay/sign. The forms you see in your inbox are your personal forms, unrelated to the business.
You can switch at any time between the business account and your personal account as follows.
Access your personal Inbox
To use Signmee as an individual, click on the name dropdown. There you will see the option to switch your persona. ‘Use Signmee as: James Dean’.
Once you select your name from the dropdown list, the navigation and view will change to your personal Signmee inbox. You will not see or manage business forms in your personal inbox. The personal inbox is where you receive forms from others to fill, pay and sign.
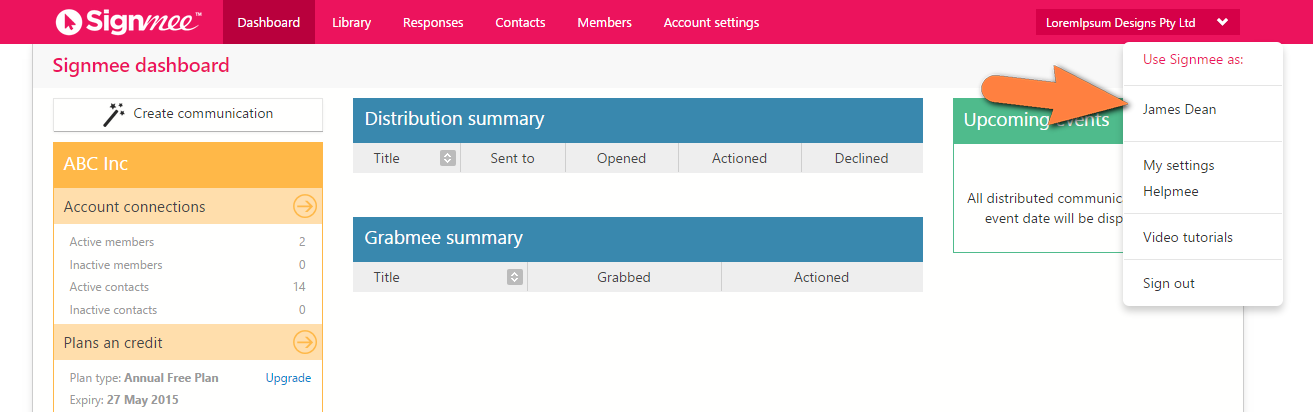
Figure 1 Business Dashboard - Select name drop-down to switch to personal account
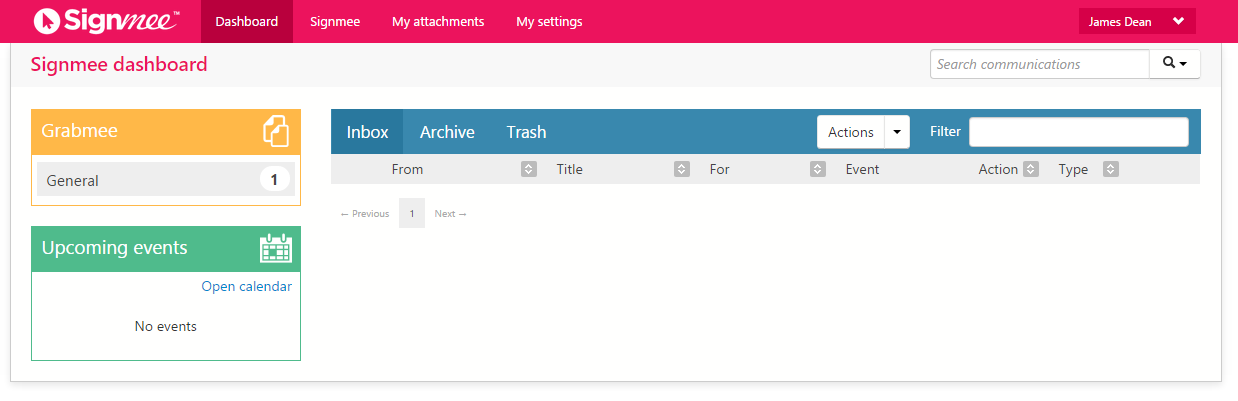
Figure 2 Personal Dashboard - Receive and store forms sent to you
Access your business account [outbox]
When you wish to create, send, track forms on behalf of your business (for business purposes), you need to be working in the business account. You can get to your business account (businesses) by clicking on the name dropdown and selecting your business. You can switch between your business and personal accounts whenever you wish.

Figure 3 Switch from personal account back to business to start building and sending forms
2 - Go to the letterhead library
Make sure you are using Signmee as the business, and select library from the navigation option at the top of the screen.
Select the letterhead tab and complete the form to build your letterhead. You can use the editor to add the content, and view the final result below the editor windows. Once you have finished the letterhead, you will need to ‘publish’.
Tip #1 – add your logo to the left column
Tip #2 – add your company name and tag line to the middle column. You may add this as an image upload, or text
Tip #3 – add your company address and contact details in the third column
NOTE: Signmee is responsive by design. When your customers view your letterhead on a smart phone, the elements will cascade down the page, making each element clear to see and read.
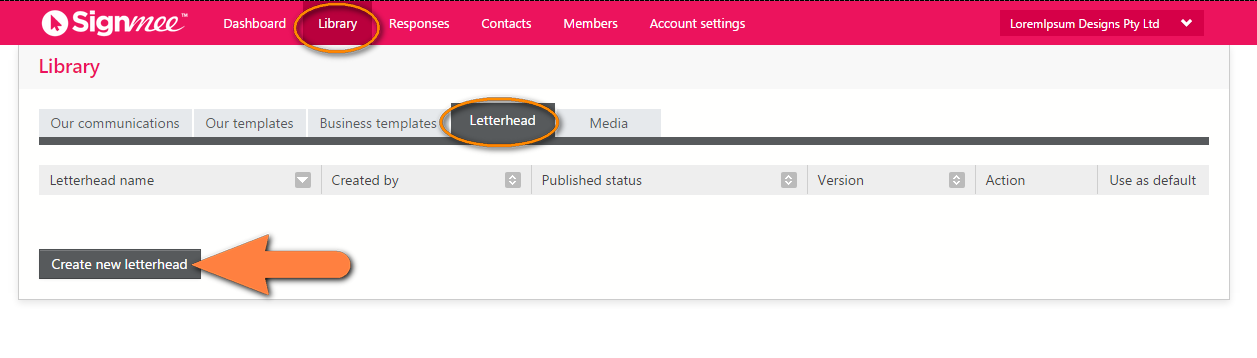
Figure 4 Letterhead library - Click create new
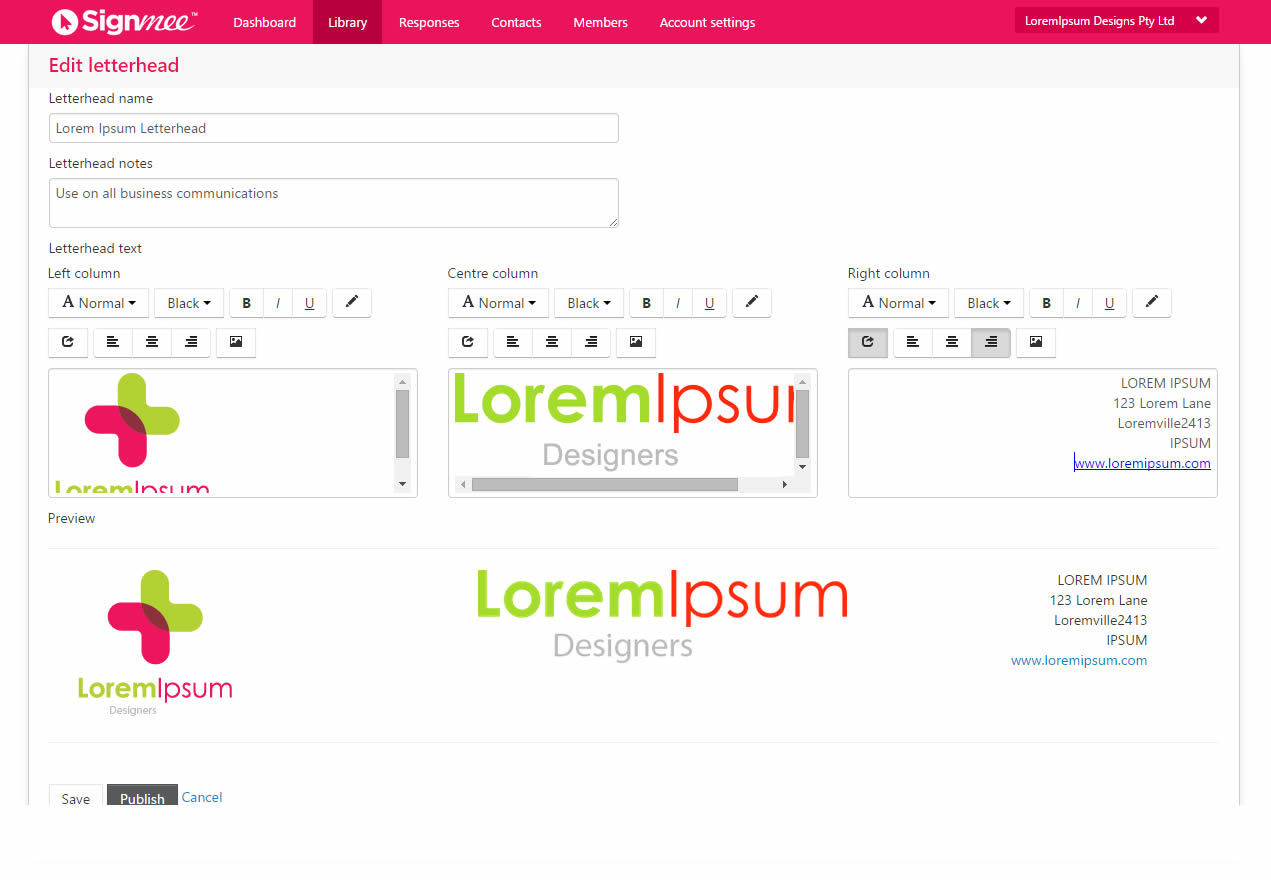
Figure 5 Letter head editor - Add logo, tag line and company details and click “Publish”
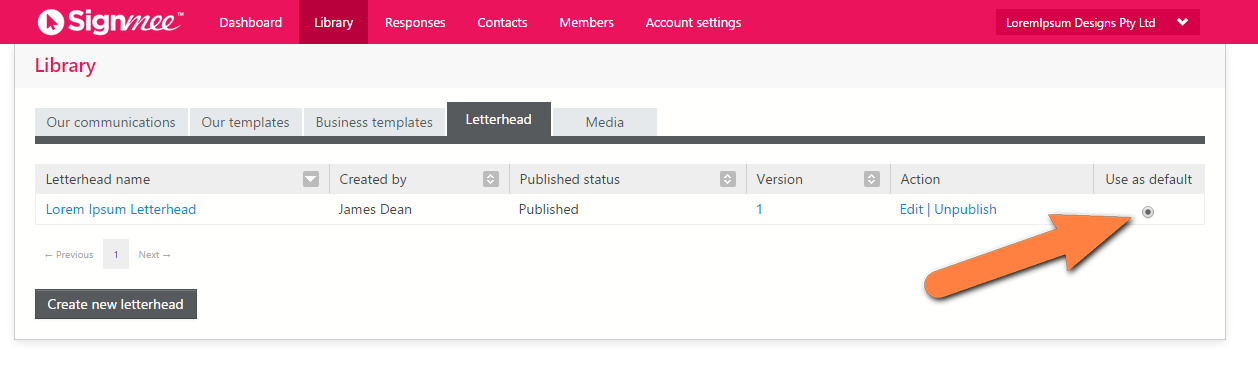
Figure 6 Saved and published letterhead – Select ‘Use as default’ button
3 – View your letterhead on a document
To see what your letterhead will look like on a form in Signmee, simply click on ‘Business templates’ tab in your Signmee library, choose a template click copy button.
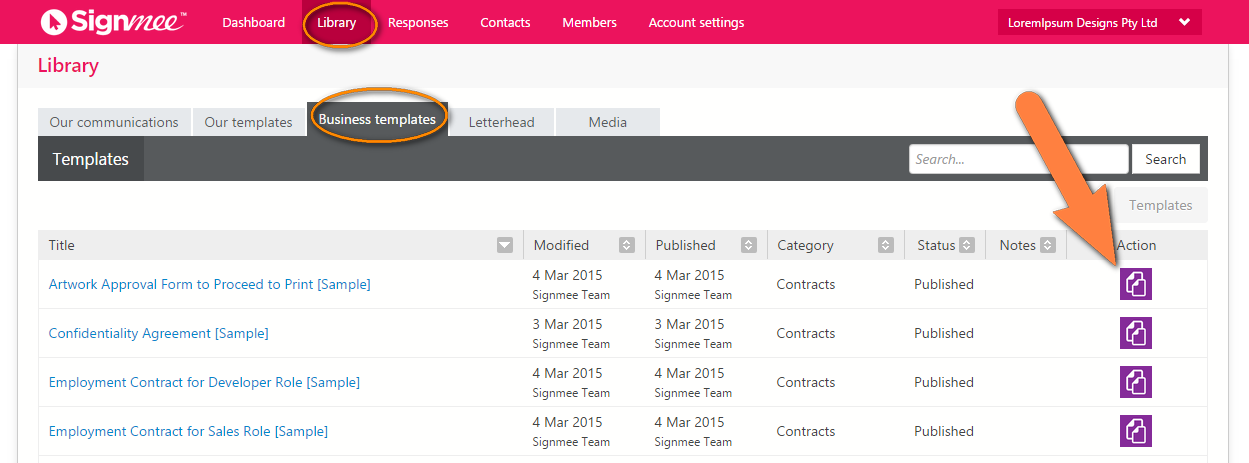
Figure 7 Business Template Library - Copy a template
Your copy will open in the Signmee form editor for you to modify. Your ‘default’ letterhead will be visible at the top of the new form. To switch between letterheads, simply click on the pencil icon and select a new letterhead from the dropdown list (NOTE: alternative options only available if you have created more than one letterhead).
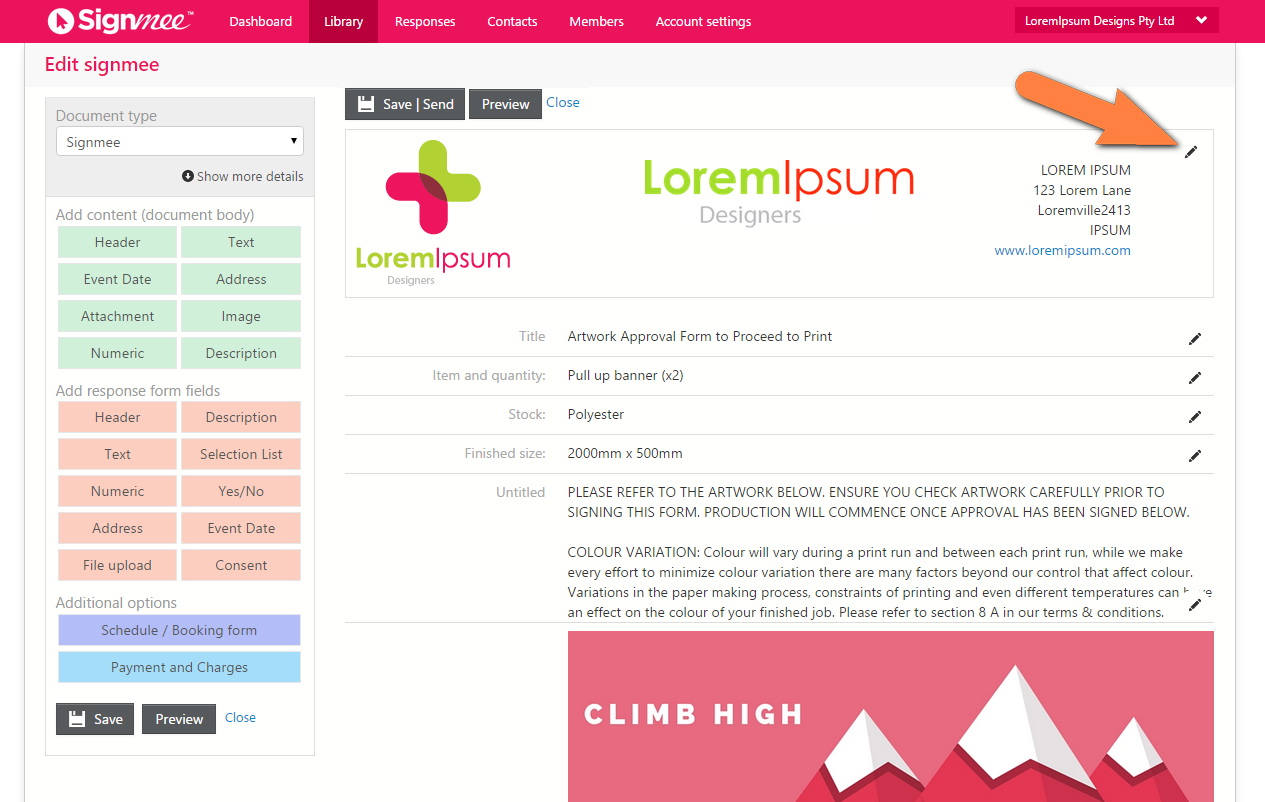
Figure 8 Signmee Form Editor - Click on the pencil icons to edit
3 – Edit your form and send to contacts
Signmee forms/documents are made up of 4 different components:
Content/body of the document
Response form (Optional)
Schedule (Optional)
Payments and charges (Optional)
3.1 - Content/body of the document
The Signmee editor has a panel on the left with all the content types you can add to your form. The green buttons are all related to the body of your form, the content section. In this section you can add text, addresses with maps, images, dates with calendaring, attachments. Simply click on the desired content type, add the necessary text and click ‘save and close’ to view the new content.
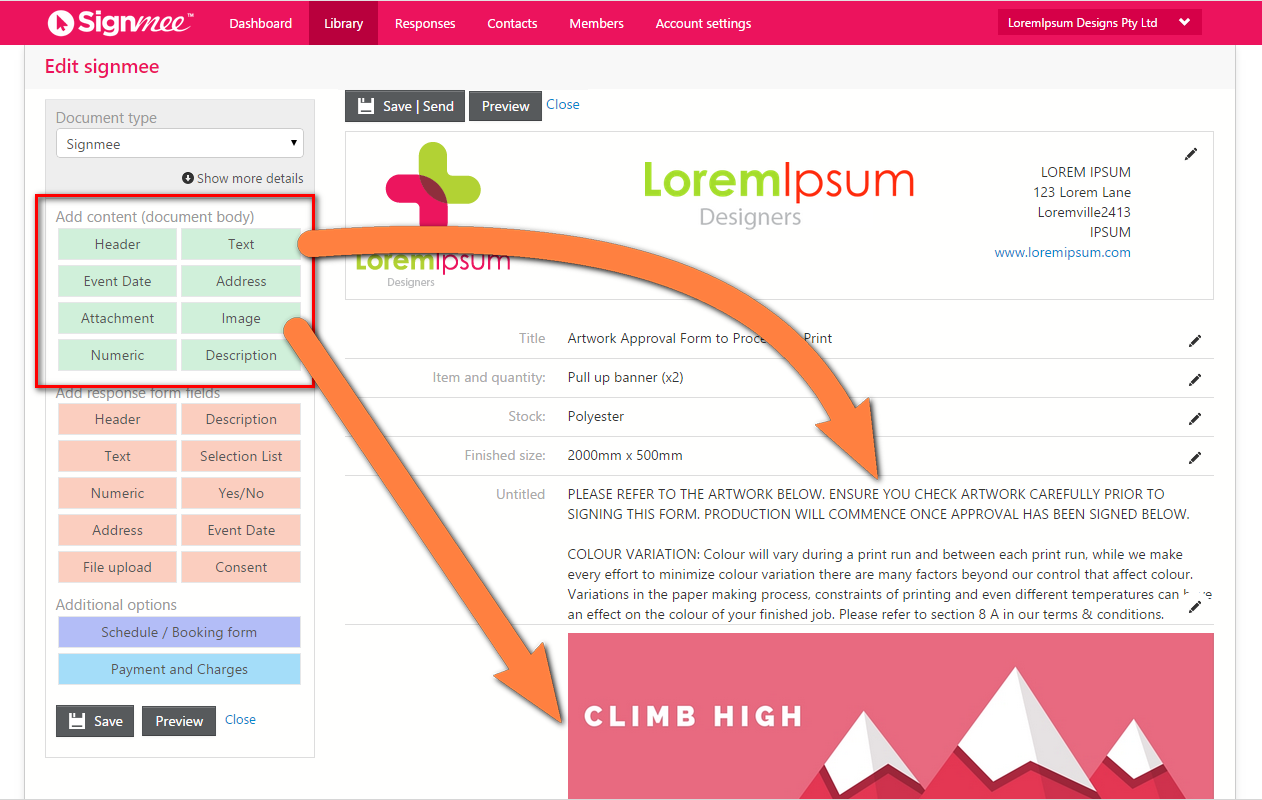
Figure 9 Signmee Editor - Add different types of content to your form
3.2 – Response form fields
The orange buttons in the editor panel are all related to the response form fields. These buttons are used to add response fields to be filled by the form recipient/s. You can ask your recipients for:
text responses
yes/no responses
selection list response (from dropdown lists, radio buttons and check boxes)
file uploads (attach documents when filling the form)
addresses from the picker, and click a consent checkbox
Response fields can be set to ‘optional’ or ‘mandatory’.
NOTE: Each field you add becomes a column in a data report (for more information on Signmee reports view ‘Signmee – Getting started: Tracking and Reporting’ in the Maestrano Knowledge Base.

Figure 10 Signmee Editor - Add form fields to your form
3.3 – Schedule/roster
A schedule can be created and added to a form, allowing receivers to book themselves in to a time slot. E.g. Volunteers to work on a stall at an event, interview schedule for staff
Add tasks, time slots and dates.
When the time slots are selected, they will no longer be available.
For an example of an interview schedule check out: https://meesys.uservoice.com/knowledgebase/articles/465208-create-a-parent-teacher-interview-schedule-beta
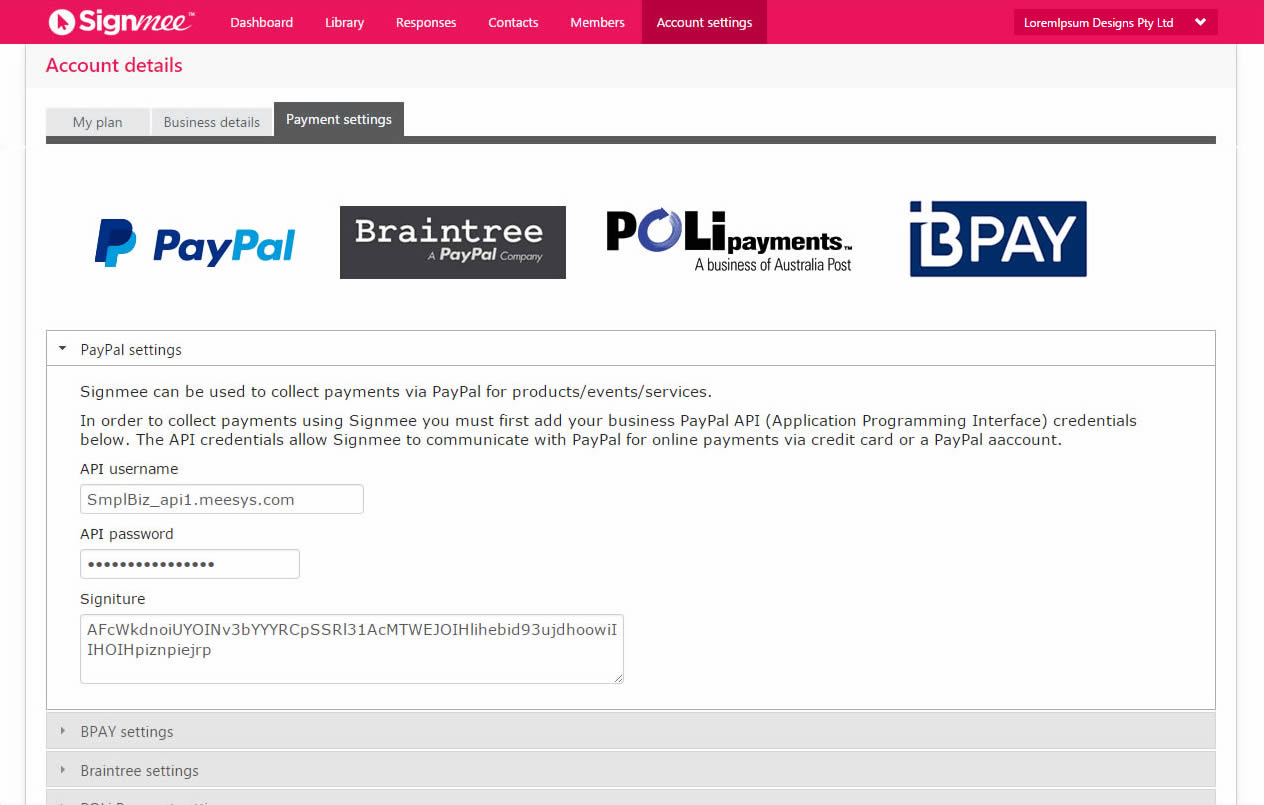
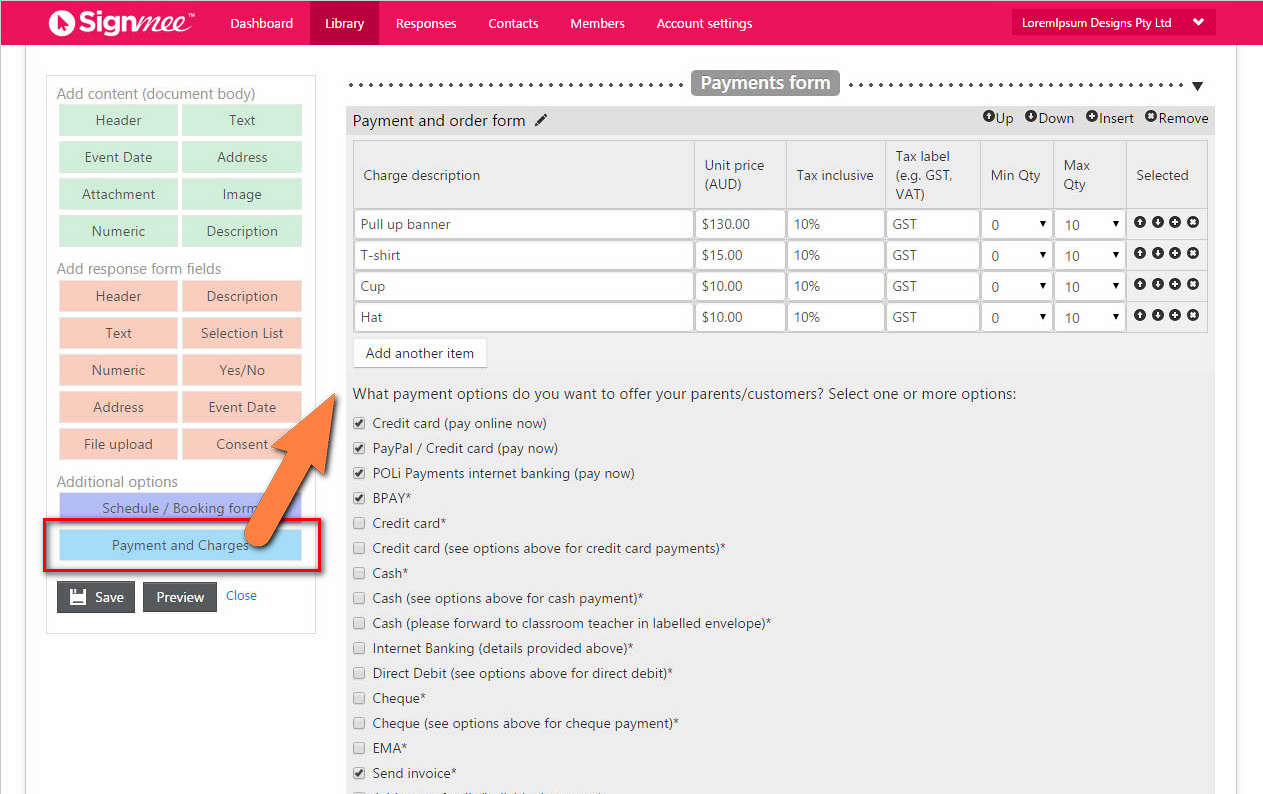
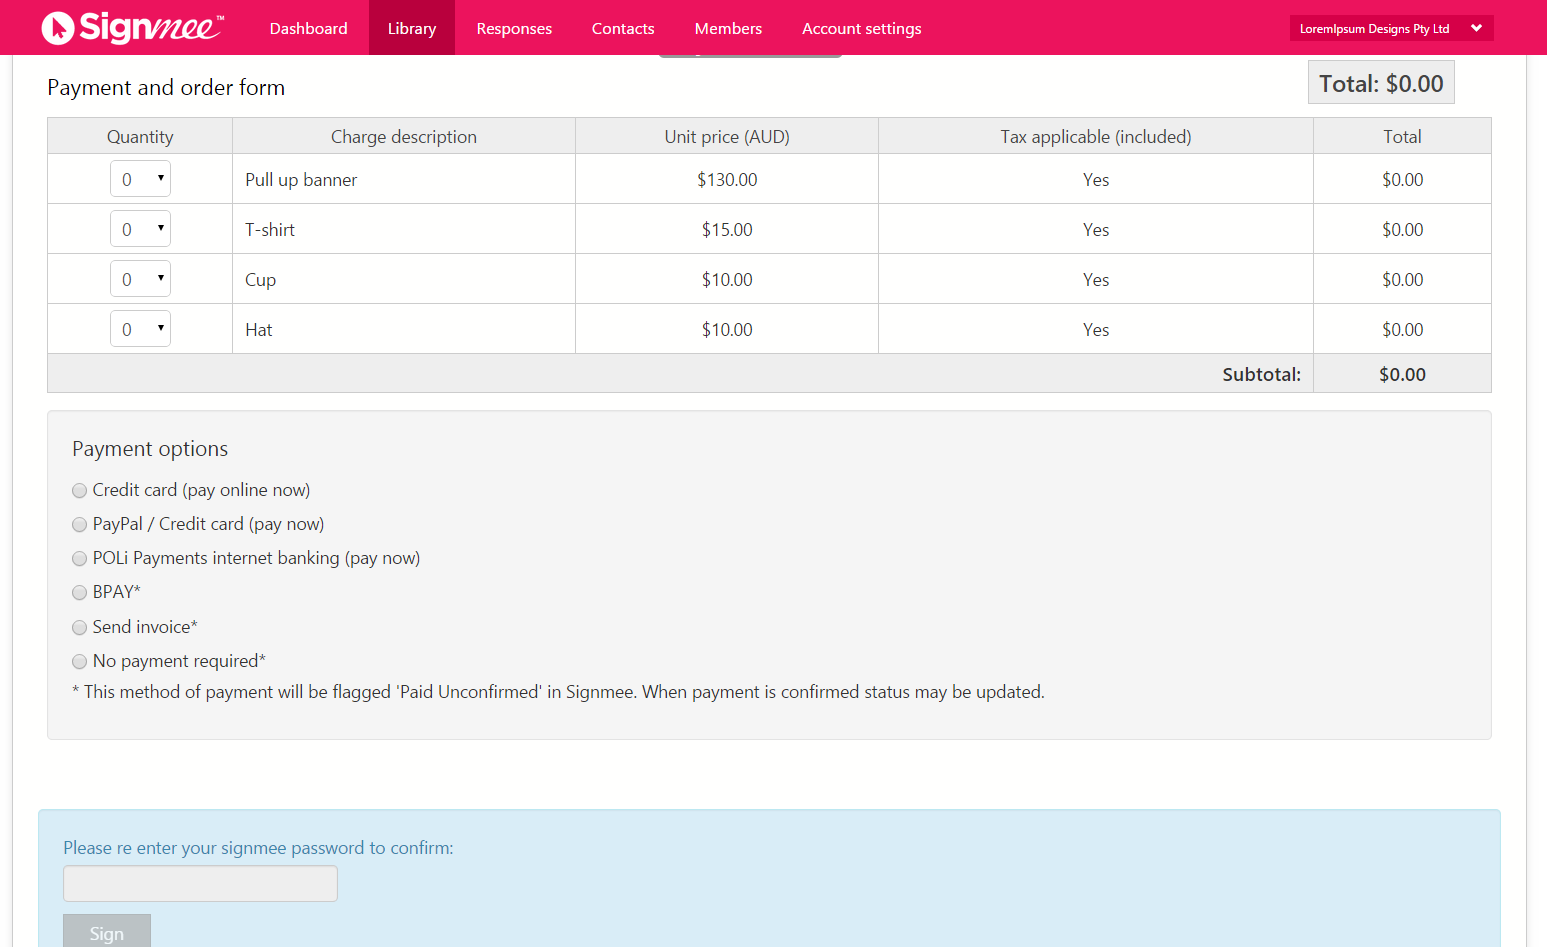
3.4 Payments and charges
Signmee is fully integrated with PayPal, Braintree, BPAY and POLi. You can add your merchant account credentials into your Signmee account settings to start receiving payments.
3.5 – Send to contacts
Once your form is complete, you can publish and distribute to your contacts for response.
Click on ‘Save / Send’ button and select ‘Save as final’.
Click ‘distribute’ and complete the distribution details – who you are sending to, deadline to sign…etc.
Once you have added the recipients from your contacts to the distribution list, you can click ‘Distribute’. Your recipients will receive an email alert advising they have a form to sign. They will be given a link to their form, which will open in their personal Signmee inbox. (If they don’t have an inbox, they will be prompted to create one in a few simple steps).
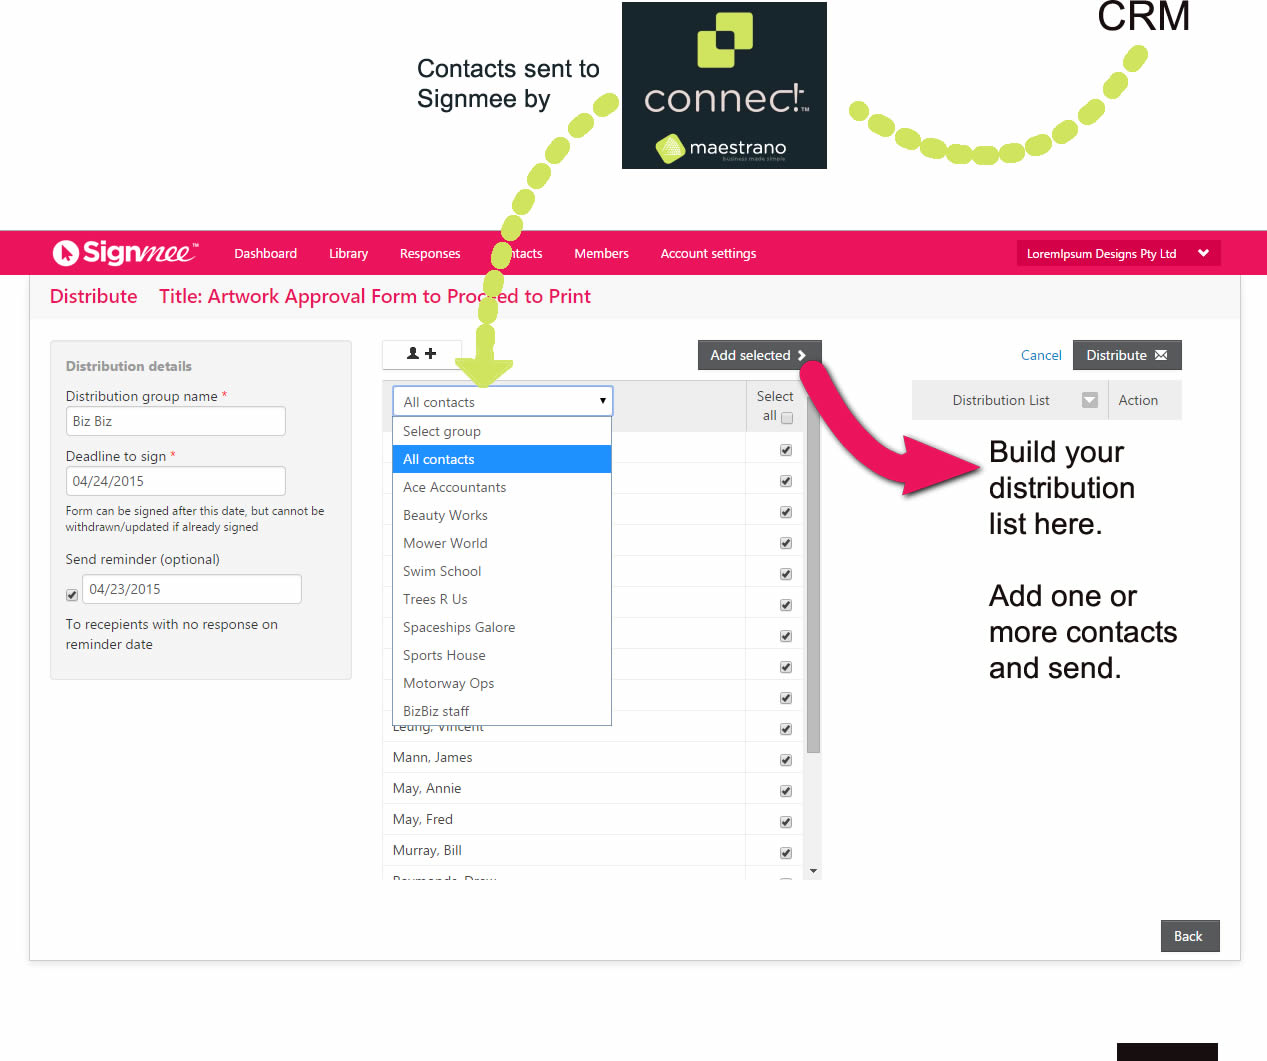
Figure 14 Distribute form to 1 or more contacts
4 – Tracking responses and download response data
Once distributed, it is easy to track the form progress from your dashboard. You will be able to monitor when the form is opened, when it is actioned/declined. You can click on any number to see further details about the distribution and to look at responses.
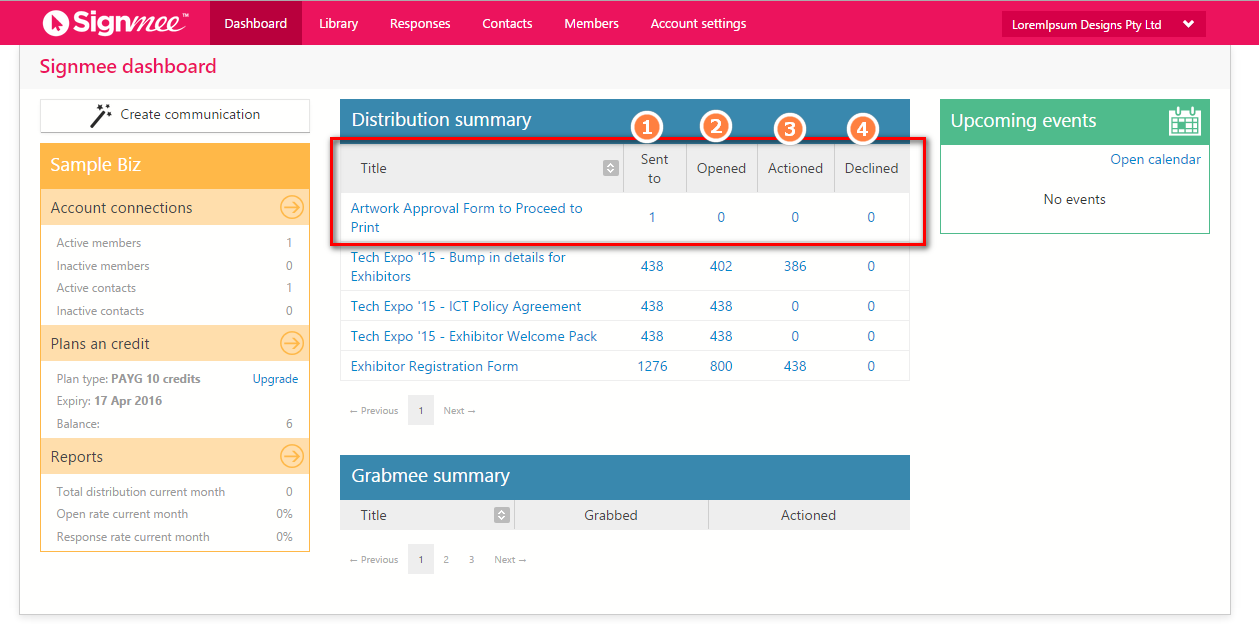
Figure 15 Business Dashboard - Tracking distributions
To view a report with response data, click on responses tab, and select the report you wish to view.
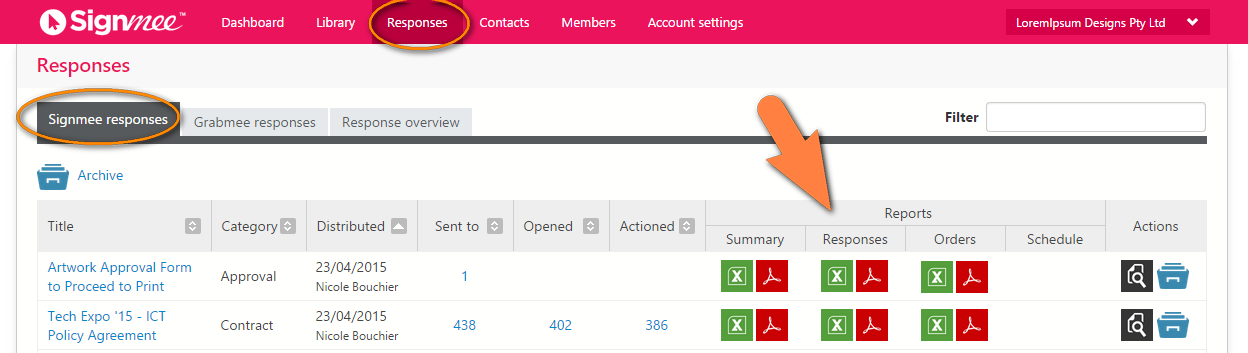
Figure 16 Signmee Data Reports for download.
Any question? Contact us on support@maestrano.com